Friday, August 29, 2014

Ebola Epidemic - New exploit topics among Scammers


Scammers are using West African Ebola Virus outbreak as a lure of Phishing campaign. As with most phishing emails, the message body warns the user of a trending problem and unsuspecting users could open the email, click on the links or even share them with others. The scary aspect inthese emails seem like they come from a legitimate source like your friends, colleagues, thus increasing the chances of a victim opening them.

Once you open that email it will ask you to click on a link to read more about the report. Following the link, infects your computer with the Trojan.Zbot malware. This malware runs on different versions of the Microsoft Windows operating system and is often used to steal information submitted through online forms such as usernames, passwords, banking details, etc.

To avoid being victimised by such scams, we should be educated about Phishing scams.
  • Be cautious of emails received from unknown senders Open email attachment with extreme care.
  • Always check the attachment’s extension. Never open attachment with “pif”, “exe”, “bat”, “.vbs” extension.
  • Do not visit suspicious websites or follow the links provided in those websites. 
  • Do not share personal or financial information over internet/email. 

Friday, March 15, 2013

What is a firewall(Part-2) and configuration of Cisco ASA5505

Hello friends so I am back with the second part of what is Firewall? As i described in last session (http://brijeshsani.blogspot.ae/2012/10/what-is-firewall.html) that a Firewall is basically kind of roadblock to keep unwanted/insecure force away from your own area. The job a firewall is very similar to physical firewall that keeps fire from spreading from one place to another.

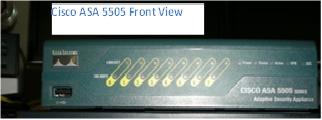
There are so many firewalls brands and models (Juniper/Fortigate/Sonicwall/Cisco) in the market. Now in this session we will know how to configure a Cisco ASA 5505 firewall with basic configuration. So let’s start now. These are some images of Cisco ASA 5505 firewall.


So let’s start with the configuration. After opening the box you need to power on the firewall. Connect your console with the firewall and you will see the following:-

Type help or ‘?’ for list of available commands.

ciscioasa>

Here you need to type the command “enable” to get in enabled mode or we can say admin mode.

ciscioasa> eanable

Password:

Ciscoasa#

Now can see it is prompting for password. Simply hit enter here because there is no enable password configured. As Cisco ASA5505 always come with default configuration which we need to delete as this default configuration having lot of thing which we don’t required and can create some network issue if you connected with your DHCP enabled network. To delete this we will use command “write erase”

ciscoasa# write erase

Erase configuration in flash memory? [confirm]

[OK]

ciscoasa#

You will be prompted to confirm that you want to erase the configuration. Simply hit enter here.

Now that you erased your startup configuration you will need to reload the ASA to get a clean configuration. You will use the “reload” command for this.

ciscoasa# reload

Proceed with reload? [confirm]

ciscoasa#

*** --- START GRACEFUL SHUTDOWN ---

Shutting down isakmp

Shutting down File system

***

*** --- SHUTDOWN NOW ---

Now when your router is restarted you will get this question:

Pre-configure Firewall now through interactive prompts [yes]?

Answer with “no” since you want to configure the ASA yourself. (You want to be a cisco engineer right?).

Now enter enabled mode (look up if you forgot how to) and issue the command “show running-config“. Just to check the current running configuration on firewall.

ciscoasa# show running-config

Now we will start main configuration.

The 1st thing you want to do is get into configuration mode. You can do this by issuing the command “configure terminal”

ciscoasa# configure terminal

ciscoasa(config)#

See the (config) aftr the device hostname denotes that you are in configuration mode.

Now we will assign hostname to our ASA firewall.

ciscoasa(config)# hostname BrijeshASA

BrijeshASA(config)#

Now you can see the hostname changes immediately.

Next step is we need to set username and password on the firewall so you can manage the ASA from your desk with SSH/Telnet/ASDM

BrijeshASA(config)# username BKS password BKSblog privilege 15

BrijeshASA(config)#

You can see we set privilege 15; it is very important as it is the highest of the privileges and provides full control over the device.

Now we will inside (LAN) IP address for ASA. In ASA 5505 we will configure VLAN instead of giving IP addresses to actual interfaces. We will use VLAN2 as our inside VLAN.

BrijeshASA(config)# interface vlan 2

BrijeshASA(config-if)# ip address 172.16.1.1 255.255.255.0

BrijeshASA(config-if)# nameif inside

INFO: security level for “inside” set to 100 by default.

This is the interesting thing that all the ASA devices work with security levels that you apply to VLANs/interfaces. With security levels you can always go from high (100) to low (0) but never the other way around unless configured otherwise. This means that no one from the outside can start a session to the inside.

Now we will start on the outside (WAN) configuration.

There are 2 way to start configuration of WAN interface. I will guide you for both options.

1st we will configure WAN interface if you have Static IP.

BrijeshASA(config)# interface vlan3

BrijeshASA(config-if)# ip address 83.111.206.230 255.255.255.252

BrijeshASA(config-if)# nameif outside

INFO: Security level for outside set to 0 by default.

BrijeshASA(config-if) exit

BrijeshASA(config)# route outside 0.0.0.0 0.0.0.0 83.111.206.229

Security level for ASA outside interface or we can say WAN interface is always 0.

You also need to make a static route if your provider supplied you with a static IP address. This is called the default gateway.

2nd way if your ISP provided IP DHCP, in this way the configuration become very easy. So let’s do this.

BrijeshASA(config)# interfaces vlan 3

BrijeshASA(config-if)# address dhcp setroute

BrijeshASA(config-if)# nameif outside

With this commands you don’t need to configure a default gateway since you will get this from your provider.

Now we need to attach the outside VLAN to one of the interface of the ASA

By default all the interfaces are attached to VLAN 2 and by default all the interfaces are in the “shutdown” state. Now I’ll attach the interface “Ethernet 0” to the outside VLAN (vlan3) and make the port operational.

BrijeshASA(config)# interface ethernet0/0

BrijeshASA(config-if)# switchport access vlan 3

BrijeshASA(config-if)# no shutdown

So this interface is attached with vlan3 and fully operational now.

Now you need to make at least one other port functional for your inside network by typing command “no shutdown:

BrijeshASA(config)# interface ethernet0/1

BrijeshASA(config-if)# switchport access vlan 2

BrijeshASA(config)# no shutdown

Most important thing I want to mark here is if you notice we didn’t use VLAN1 which is the default VLAN for every switch port. The reason behind this is security, because as this is the default vlan so hackers easily get access our network.

Now you need to configure NAT so that your internet service starts.

At this point we need to make global interface to where all the addresses from the inside can be translated to.

BrijeshASA(config)# global (outside) 10 interface

INFO: outside interface address added to PAT pool

If you notice we use number 10 in this command. Actually number 10 is an identifier. This way you can tell the NAT ot the inside to which outside IP address they should translate to.

2nd this we will do here to make NAT rule for inside network also.

BrijeshASA(config)# nat (inside) 10 172.16.1.0 255.255.255.0

BrijeshASA(config)#

I use number 10 in this rule. This links the inside network to the outside global. The subnet states that the network 172.16.1.0/24 is allowed to be translated to the outside IP address.

So enjoy now! Your internet services have been started.

Now question is we really required to walk to server room all the time whenever we need to manager our ASA. Don’t worry we can do it using SSH/telnet or ASDM. ASDM is GUI for ASA which stands for Advanced Security Device Manager.

So now I’ll show you how to configure ASA for ASDM and SSH.

So let’s start first with SSH. To enable SSH you will need to generate a key which will encrypt the traffic between the user and the ASA.

BrijeshASA(config)# crypto key generate rsa modulus 1024

INFO: the name for the keys will be:

Keypair generation process begin. Please wait….

BrijeshASA(config)#

Now we want to use the username we made earlier to connect to the ASA with SSH.

BrijeshASA(config)# aaa authentication ssh console LOCAL

The LOCAL means that the ASA uses the local username database to authenticate users.

When this is done you need to tell ASA which IP address are allowed to connect to the ASA. We will only allow users on the inside to access the ASA by SSH.

BrijeshASA(config)# ssh 172.16.1.0 255.255.255.0 inside

So now are are can access your ASA from your LAN.

Now we will enable ASDM GUI.

BrijeshASA(config)# http server enable

The above command enables ASDM on the ASA.

We want to use the username we made earlier and tell which networks are allowed to connect to the ASA with the ASDM.

BrijeshASA(config)# aaa authentication http consol LOCAL

BrijeshASA(config)# http 172.16.1.0 25.255.255.0 inside

When this is done you want to make sure your ASA doesn’t start up without a configuration next time the ASA reboots. You can do this by saving the configuration with the following command.

BrijeshASA(config)# write mem

Building configuration …

Cryptochecksum: e5fa3ae8 add2aae4 c0be8847 79cec1ba

2502 bytes copied in 1.190 secs (2502 bytes/sec)

[ok]

BrijeshASA(config)#

So friends Congrates your ASA configuration

Next time I’ll guide you more about ASA firewall configuration including firewall rules to access networks/blocking domains,policy, and other options.

Sunday, March 10, 2013

WHY MOST OF THE BOSSES FAILED TO BE AN “IDEAL”

In last few months I observed that some of my friends resigned from their positions. Even these companies are the most known/Strongest MNCs. I asked few of them why you left/resigned, expecting an answer like “I was looking more challenging role”, or “Same post/responsibilities killing their talents”, but instead they said “They couldn’t work with their bosses any more”.

The work was stimulating, the team was great but their mangers were unbearable to work with. In this situation companies lose good employees on a regular basis and all the managers sit around a conference table trying to address employee attrition, developing strategies for employee retention.

After this observation I decided to do some research where most bosses failed to be an ideal for their sub-ordinates. Or we can say how we can find out bad bosses in every company including us. No doubt somewhere we are also boss for some one.

Divides and Rule Policy: Bad bosses always believe in Divide and Rule policy. They always manipulate their team members, employees even their own bosses. They always have this phycology that in this they will get more importance of their team members/employees/Colleagues and their own bosses.

Lack of communication power:  Bad bosses always try to hide the right information from their team members. They always keep all the information with them. This situation really demotivates their team members, when they get the right information in middle or at the end of each work/task and they need to start their work from scratch.

Always Feel Insecure: Bad bosses always feel insecure whenever they see someone in their team/company have more capabilities to grow and give batter results then them. In this situation they always use all their efforts to pull that team member/colleague down. And many times they avoid giving any important task to that team member so that he/she can’t show his/her real talent to get the job done.

Make unrealistic plans: Bad Bosses always make Big/Unrealistic plan just to impress top management. It is common in every organization that bosses accept a plan even they knew, their team don’t have that much related capable resources to achieve this plan. This condition put extra burden over the existing team members to finish this plan on time.

Politics and Inequity: Most common issue in every bad boss, they made workplace as a politics ground. Instead of concentrate over the work, or over the team support, bad bosses always busy to make political plan to show someone down in their team/company. These type of bosses always keep some Chaplus employees with them and feed (either they are working or not) them to support their political plans to get down someone else in company/team.

Backbiters: Backbiters bosses always talk about everyone behind their back. Remember this type of bosses always show that they are doing good rather than someone else. And in this case they always talk firstly about them who is the most sincere in their team/company, so that everyone start making/thinking wrong image about those sincere people.

Lack of Confidences: As they are not trust worthy due to their negative images they always have low confidence issue. Bad bosses always order/assign work to their team with marking that super bosses decided this they don’t. This always shows that they don’t have confidence that team/employees will accept their decision or not. They knew someone can raise finger if they declare that they took this decision their self not by the management.

Never talk straight: Bad bosses never talk straight about any work. They always talk in Mari-go-round way but never to the point. You will go to discuss some issue but they will never talk about that issue and will start talking about something else.

May be the above given point are less, but these are the main factor that destroy a boss image as an ideal boss. It’s not about our bosses; remember it’s about us also because we are also the future boss. Hope this article help to reduce our negativ habits, so that we can buide an example of a good boss.

Tuesday, October 16, 2012

What is a firewall

Hello everyone I here again. Today I am going to describe about firewall. It is a common question which I answered to my friend or users about firewall. So today I’ll explain about firewall. Whenever you work on internet in office/home/school you always listen about firewall. Yes of course some of us always complain about it also, well-well that’s the other side of the coin. In this and upcoming post I’ll describe about firewall and how its work.

Firewall is basically kind of roadblock to keep unwanted/insecure force away from your own area. The job a firewall is very similar to physical firewall that keeps fire from spreading from one place to another.

A firewall is a software or hardware that filters information pass through the internet into our LAN or computer system. If accessed information packet is marked by filters, it is not allowed through the network.

One example I would like to give to better understand the concept the Firewall. Suppose you have 200 employees with the internet connection to all with no firewall in network. All the computers don’t have any restrictions over the internet. Employees accessing public mails/Accessing LAN FTP over internet without any restrictions. In this case hackers have 100% freedom to enter in your network and they can fully control your network, they can easily still company’s important data.

In apposite case if this company installed firewall with limited rights to access internet. They can access only that service what is permitted to them. Suppose an employee need to access FTP service, so in that case this service can be permitted to that employee only not to everyone.

Methods using by Firewalls: Every firewall use one or more three methods to control traffic flowing in and out of the network –

Packet Filtering: Packets (small piece of data) are analyzed against a set of filters. Packets that make it through the filters are sent to the requesting system and all others are discarded.

Proxy Service: Information from the internet is retrieved by the firewall and then sent to the requesting system and vice versa.

Stateful Inspection: A newer method that doesn’t examine the contents of each packet but instead of this compares certain key parts of the packet to a database of trusted information. Information traveling from inside the firewall to the outside is monitored for specific defining characteristics, and then incoming information is compared to these characteristics. If the comparison yields a reasonable match, the information is allowed through. Otherwise it is discarded. In next post we will talk about Firewall configuration/ and why firewall is secure to protect our network.

Friday, October 5, 2012

DCPromo in Active Directory

Every system admin or system eng. knew the tool DCPromo. It is use to install or modify AD/DC. But during the last 10 years DCPromo brings so many changes in it. So today I’ll describe some more things about DCPromo including the changes which it brings in new OS.

DCpromo introduce first in Windows 2000 Beta version, although Microsoft improved DCPromo with the updates and in their new versions of server OS but largely it remain same. There are a number of options (some undocumented) that has made DCPromo a valuable tool (in fact, the only tool) in building an AD domain or forest. It is a local program that could be run from a Windows Server (in 2000 and 2003) and from Server Manager in Windows Server 2008 and later. Beginning in Windows Server 2008, Active Directory Domain Services role had to be installed prior to running DCPromo, but it still needed to run to make the server a DC.

One of the tricks DCpromo plays on you is lulling you into false security. When the installation finished and the server rebooted, you thought it was promoted and ready to roll. What isn’t obvious is what happens after the reboot; an outbound connection is made, AD Replication and file replication service (FRS) connections are made to complete the sync and get group policies and Netlogon and Sysvol shares are created.

To determine if a DC is really a DC do a Net Share command from a command line and see if these two shares show up. If not, the replication failed. AD replication forced sync with the other DCs where only a single sourcing DC was involved prior to the reboot. In Windows 2000, getting each DC to do a full sync was a serial process. Windows Server 2003 got smarter and synched updates from the other DCs.

If you wanted to add a DC from a newer Windows version, such as adding a Windows 2008 DC into a Windows 2003 domain/forest, it was a complicated process. This required a few things to happen.

 The first was the raising the domain and forest functional levels. All domain controllers had to be raised to the Windows 2008 level, the domain level and the forest level. But a major problem with doing this was the changes being irreversible.

 The second was running ADPrep. This required schema administrator privileges because it had to contact the Schema Master. Because there was a fear of messing up the Schema, this was usually done prior to promoting a new DC.

The one missing element was that you had to be on the machine, physically or via remote desktop, and there was not a way to mass deploy DCs until Windows Server 2012.

Other highlights include:

Manual demotion of a DC in 2003: DCPromo /ForceRemoval. This was not documented, but it is handy in demoting a DC when it wasn’t replicating, if it was the only DC with the problem and if it would take more than a couple hours to fix. This required cleaning AD objects of that server via NTDSUtil and Sites and Services snap-in.

Doing a forceful removal has serious consequences, which include removing the server from the domain, putting it into a work group and breaking applications that depend on AD association. Use it only if there is no other way to recover.

Install From Media (IFM): First introduced in Server 2003, IFM permitted a DC to be promoted off line using backup media. It also got around the issue of a GC with a large DIT file having to replicate across the WAN to be rebuilt. I know of a company that used to take anywhere from three to five days to replicate. When they went to IFM, the time was reduced to less than one hour. IFM was implemented in 2003 with the DCPromo /ADV option, (Figure 1) and moved into the NTDSUtil tool in 2008 and included the ability to create snapshots without a separate backup tool. IFM is also improved in Windows Server 2012.


Figure 1. IFM was implemented in Windows Server 2003
Windows 2003 tweaked DCPromo to make DNS easier to install, though they did introduce a few problems initially.

Windows 2008 made a radical departure in the implementation of AD by stuffing AD into a service (Figure 2). Beginning in this version the Active Directory Domain Services role had to be installed on a server before running DCPromo. This allowed stopping AD without rebooting to the old DSRM mode.


Figure 2. In Windows Server 2008, AD was moved into a service,
which meant ADDS needed to be installed before running DCPromo.


DCPromo also plays a vital role in disaster recovery of a domain or forest DC. You may think that losing an entire domain or multiple domain forest is a remote possibility, but I have seen it happen.Yes it is a new thing for me also and I was surprised in same way what you are after reading mine above line on recovery of domain forest.

Microsoft one of the whitepaper defines this in recommends restoring a domain from backups. You can do this by restoring one DC, preferably a DNS server, from media. Then, use DCPromo to create replica DCs. You will bump up against the performance issue on the wire and slow other operations on the network.

Microsoft also recommends a forest recovery in a similar manner. Its recommendation includes restoring one DC from media for each domain, creating a replica DC in each domain before restoring another domain.

You can do a disaster recovery of a domain or forest by following the steps in Microsoft’s forest recovery whitepaper.

Hope this post will be usefull , best of luck.

Sunday, September 16, 2012

Malware being installed in PCs during manufacturing

New computers, still under development in factories, are being infected withmalware in their production lines, a new Microsoft study has suggested.

One virus called Nitol found by Microsoft steals personal details to help criminals plunder online bank accounts.

The viruses were discovered when Microsoft's digital crime investigators bought 20 PCs, 10 desktops and 10 laptops from different cities in China, out of which four were infected with malicious programmes even though they were fresh from the factory, the BBC reports.

Nitol was the most pernicious of the viruses Microsoft caught because, as soon as the computer was turned on, it tried to contact the command and control system set up by Nitol's makers to steal data from infected machines.
Further investigation revealed that the botnet behind Nitol was being run from a web domain that had been involved in cybercrime since 2008. Also on that domain were 70,000 separate sub-domains used by 500 separate strains of malware to fool victims or steal data.

"We found malware capable of remotely turning on an infected computer's microphone and video camera, potentially giving a cybercriminal eyes and ears into a victim's home or business," said Richard Boscovich, a lawyer in Microsoft's digital crimes unit in a blogpost.

A US court has now given Microsoft permission to seize control of the web domain, 3322.org, which it claims is involved with the Nitol infections.
By: BBC Reports

Sunday, August 26, 2012

What is VPN and how it works? (Part-3) - Final

In the last section we discussed about the types of VPN. It is as easy and cheap way to access your LAN over the VPN. But at the time of planning of VPN in for corporate network one question always asked about the reliability and security of communication over VPN. So lets discuss about the security of VPN.

Most VPNs rely on tunneling to create a private network that reaches across the Internet. Tunneling is the process of placing an entire packet within another packet before it's transported over the Internet. That outer packet protects the contents from public view and ensures that the packet moves within a virtual tunnel. This layering of packets is called encapsulation. Computers or other network devices at both ends of the tunnel, called tunnel interfaces, can encapsulate outgoing packets and reopen incoming packets. Users (at one end of the tunnel) and IT personnel (at one or both ends of the tunnel) configure the tunnel interfaces they're responsible for to use a tunneling protocol. Also called an encapsulation protocol, a tunneling protocol is a standardized way to encapsulate packets [L2F, PPTP, and L2TP].

The purpose of the tunneling protocol is to add a layer of security that protects each packet on its journey over the Internet. The packet is traveling with the same transport protocol it would have used without the tunnel; this protocol defines how each computer sends and receives data over its ISP. Each inner packet still maintains the passenger protocol, such as Internet protocol (IP) or AppleTalk, which defines how it travels on the LANs at each end of the tunnel. The tunneling protocol used for encapsulation adds a layer of security to protect the packet on its journey over the Internet.

Encryption and Security Protocols in a VPN

Encryption is the process of encoding data so that only a computer with the right decoder will be able to read and use it. You could use encryption to protect files on your computer or e-mails you send to friends or colleagues. An encryption key tells the computer what computations to perform on data in order to encrypt or decrypt it. The most common forms of encryption are symmetric-key encryption or public-key encryption:
  • In symmetric-key encryption, all computers share the same key used to both encrypt and decrypt a message.
  • In public-key encryption, each computer has a public-private key pair. One computer uses its private key to encrypt a message, and another computer uses the corresponding public key to decrypt that message.
VPN needs more than just a pair of keys to apply encryption. That's where protocols come in. A site-to-site VPN could use either Internet protocol security protocol (IPsec) or generic routing encapsulation (GRE). GRE provides the framework for how to package the passenger protocol for transport over the Internet protocol (IP). This framework includes information on what type of packet you're encapsulating and the connection between sender and receiver.

IPSec is a widely used protocol for securing traffic on IP networks, including the Internet. IPSec can encrypt data between various devices, including router to router, firewall to router, desktop to router, and desktop to server. IPSec consists of two sub-protocols which provide the instructions a VPN needs to secure its packets:
  • Encapsulated Security Payload (ESP) encrypts the packet's payload (the data it's transporting) with a symmetric key.
  • Authentication Header (AH) uses a hashing operation on the packet header to help hide certain packet information (like the sender's identity) until it gets to its destination.
In a remote- access VPN, tunneling typically relies on Point-to-point Protocol (PPP) which is part of the native protocols used by the Internet. More accurately, though, remote-access VPNs use one of three protocols based on PPP:
  • L2F (Layer 2 Forwarding) -- Developed by Cisco; uses any authentication scheme supported by PPP
  • PPTP (Point-to-point Tunneling Protocol) -- Supports 40-bit and 128-bit encryption and any authentication scheme supported by PPP
  • L2TP (Layer 2 Tunneling Protocol) -- Combines features of PPTP and L2F and fully supports IPSec; also applicable in site-to-site VPNs
So after this final part of VPN, I believe everyone got the full concept of VPN and its working topology as well as the types of VPN. Yes, may be before this article you had doubts about the reliability of communication over VPN. It is secure or not. Hopefully this article cleared your doubts about the security of the data when you are keeping it in VPN.

Thanks so much for reading this article, your feedback is required.